LIMITED TIME: Inside Story Annual Plan is 50% off — subscribe now and get free Inside Edges credits. Claim your discount →

Inside EdgesInsideEdges
Help Guide

Creating a Custom Edge Image

A walkthrough for making your own edge design using Canva and uploading it to Inside Edges.

1

Upload your PDF

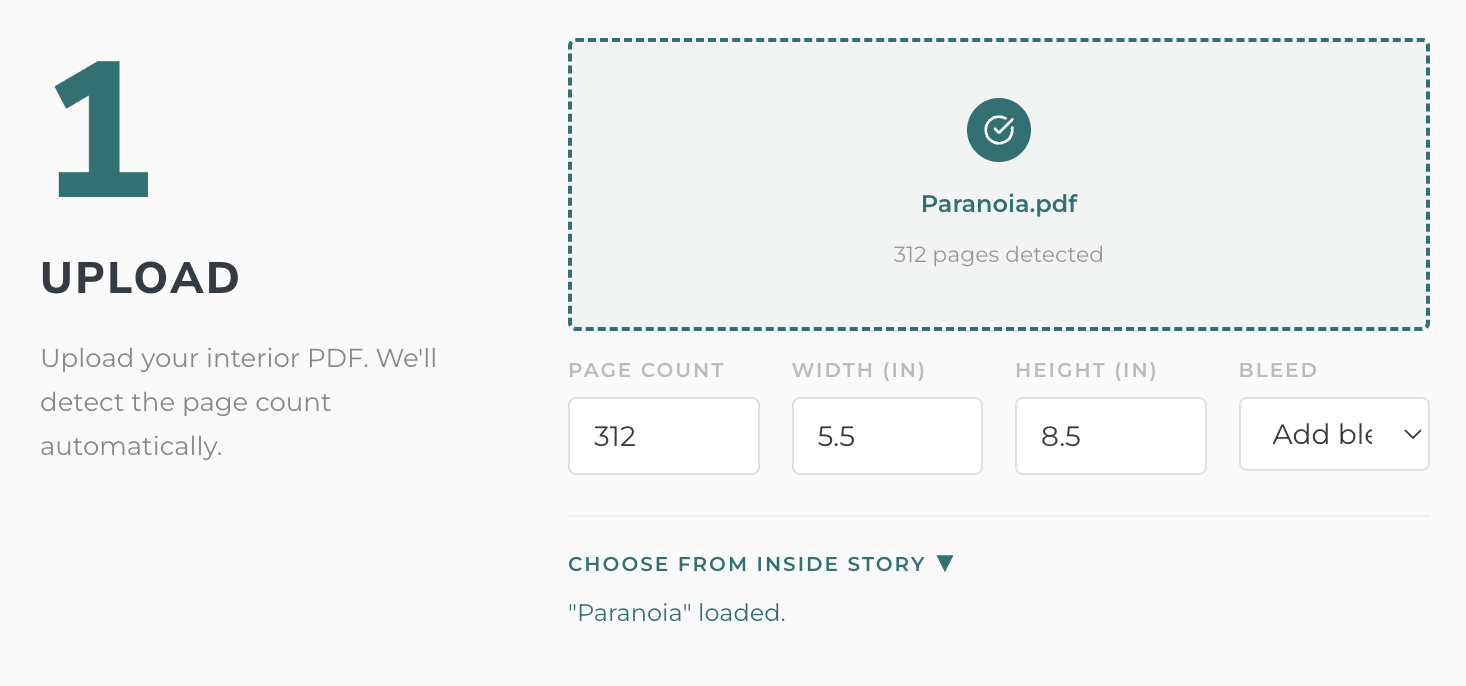
On the Create page, upload your interior PDF — or, if you have an Inside Story account, select a book that already has a PDF loaded.

Inside Edges will automatically read the page count, width, height, and whether your PDF already includes a bleed zone or needs one added.

Uploading a PDF on the Create page

2

Get the right image size

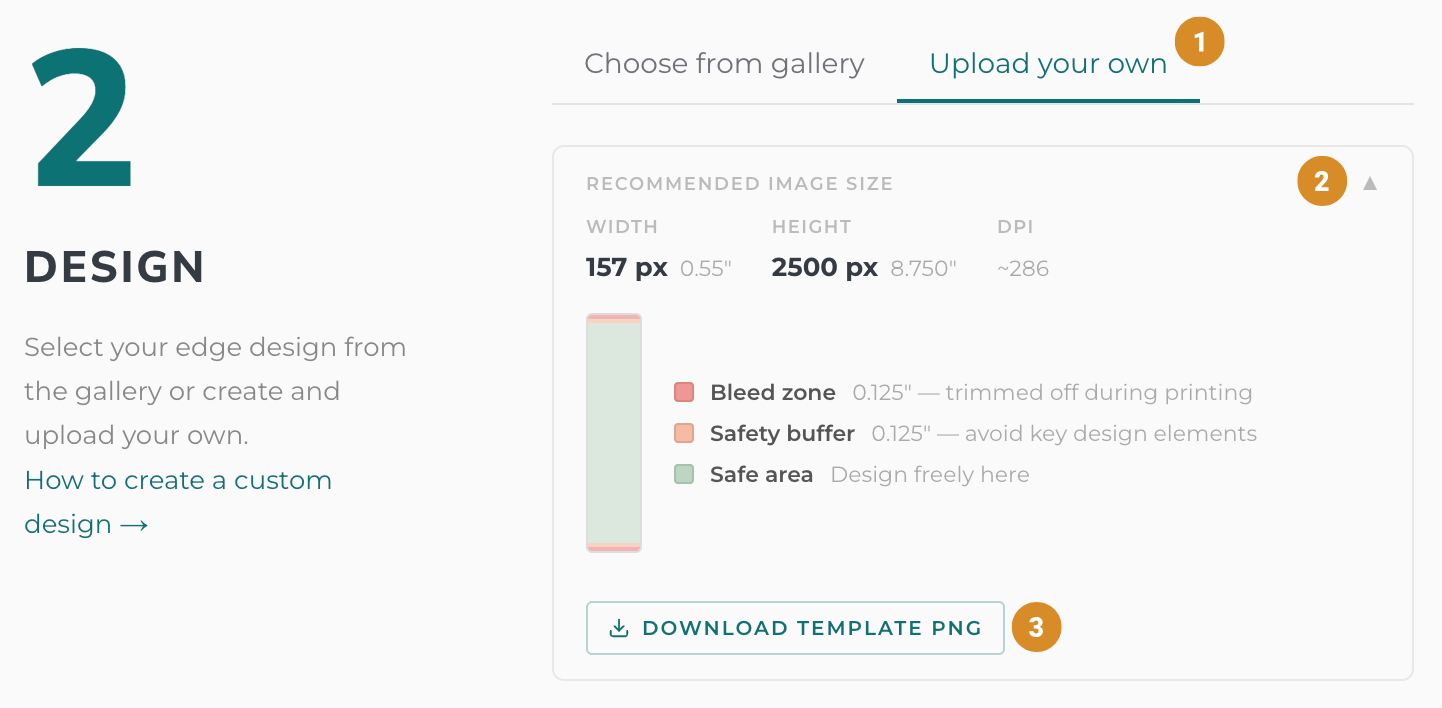
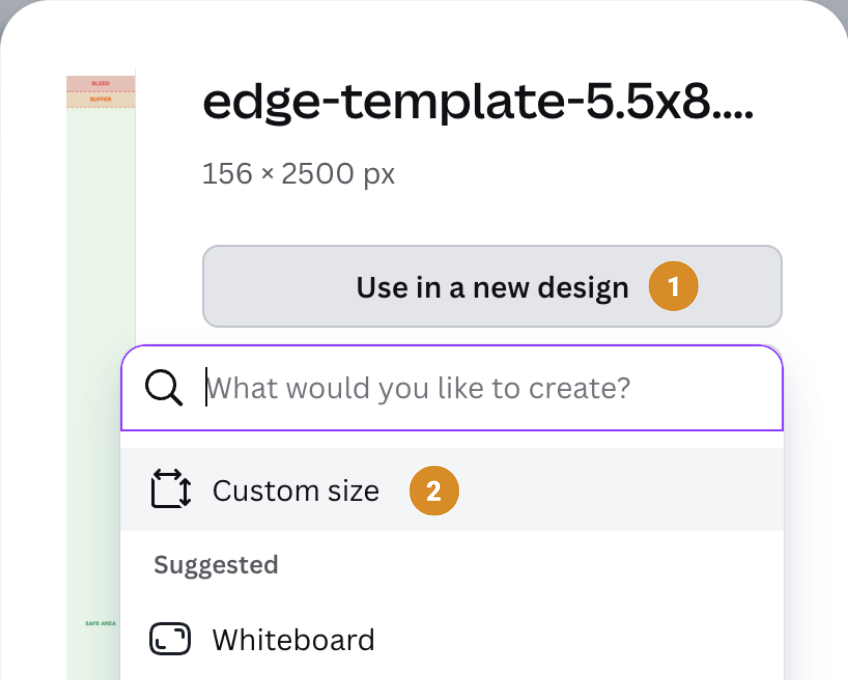
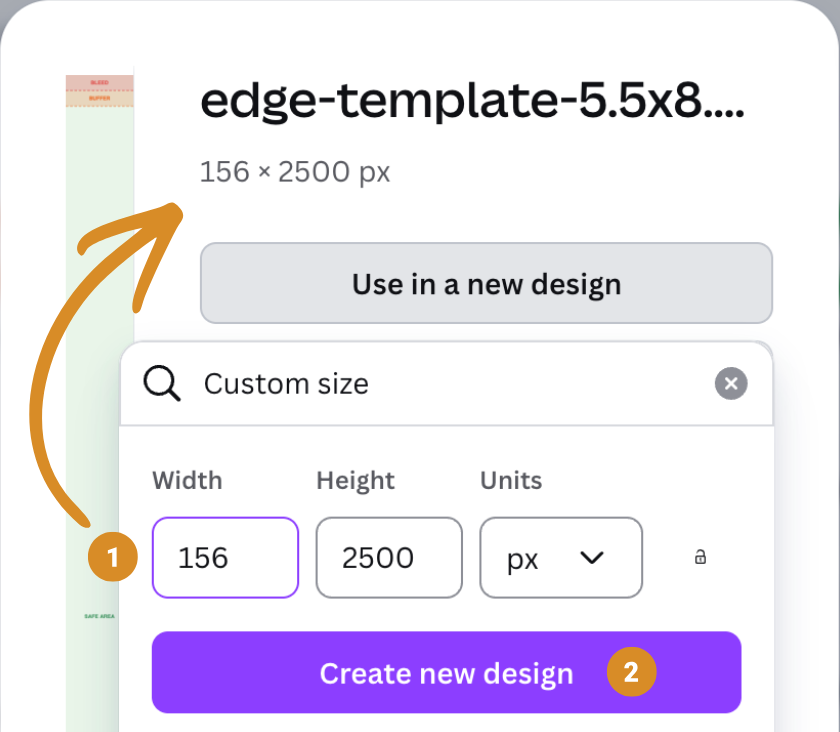
In Step 2 on the Create page, select the Upload your own tab. Then click Recommended Image Size. A box will appear showing the exact width and height — in pixels — that your edge image should be for this specific PDF.

Once you have those numbers, click Download Template PNG. This gives you a correctly sized template file to use as the base for your design in Canva.

Upload your own tab showing Recommended Image Size and Download Template PNG

3

Create your design in Canva

These steps use Canva (recommended), but any image editor that supports PNG export will work.

1
Open Canva and click Create.Canva Create button
2
Click Upload, then drop your downloaded template into the box — or click Upload files and select it from your Downloads folder.Canva Upload panel for dropping in the template file
3
Click Use in a new design, then select Custom size.Canva new design with Custom size selected
4
Canva should automatically fill in the correct dimensions from your template. Double-check they are the same, and adjust if needed. Then click Create new design.Canva Create new design button
5

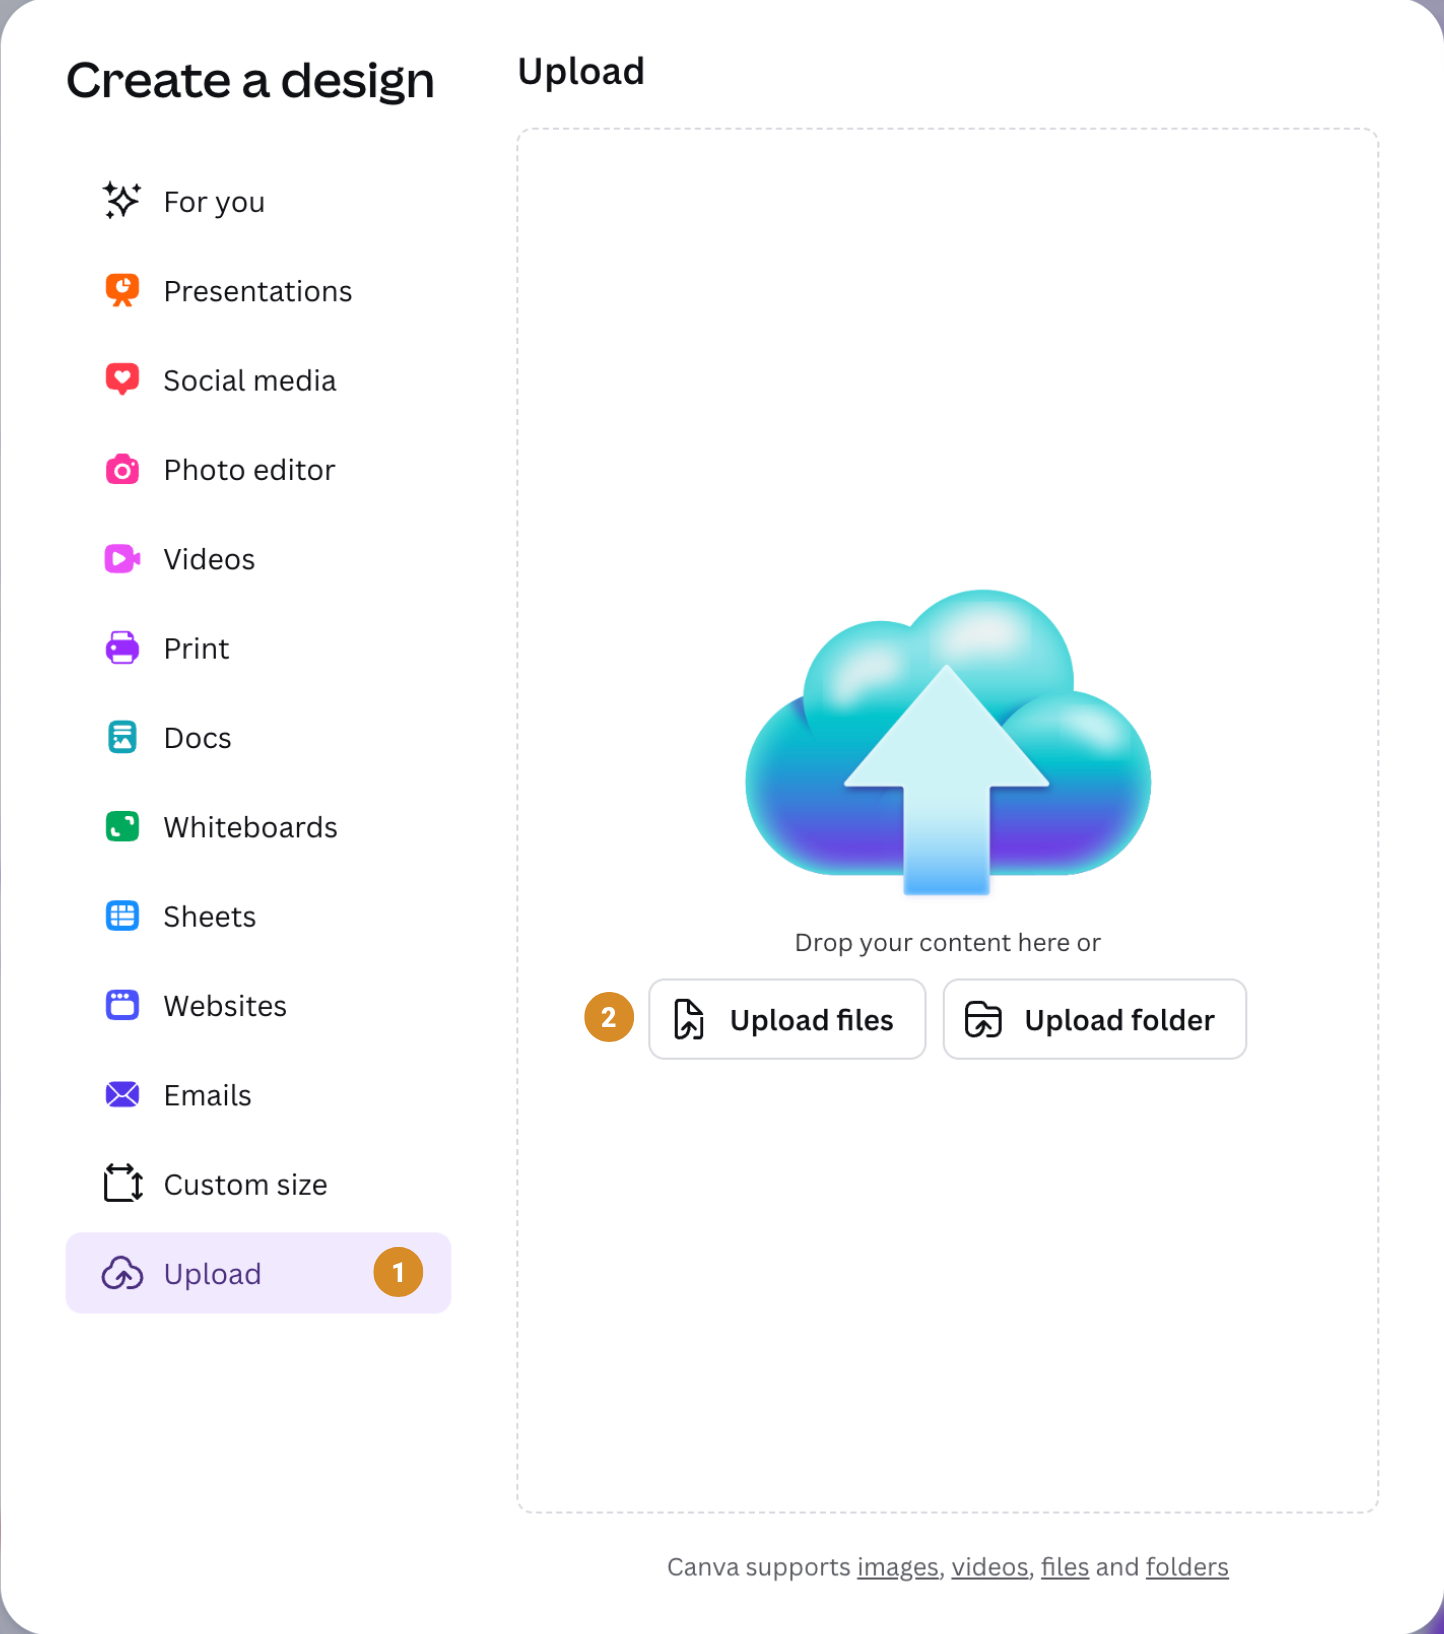
Use Canva images or your own to build your edge design. The template shows three margin zones — keep important design elements out of the red and orange zones:

Red zoneVery likely to be trimmed off during book binding
Orange zoneMay be partially trimmed
Green zoneSafe — will not be trimmed
Make sure to follow Canva’s terms and policies when using their image library in your design.
6
If the template is still visible through your finished design, delete it before saving. If it’s completely covered, you don’t need to.
7
Click Share, then Download.Canva Share then Download option
8

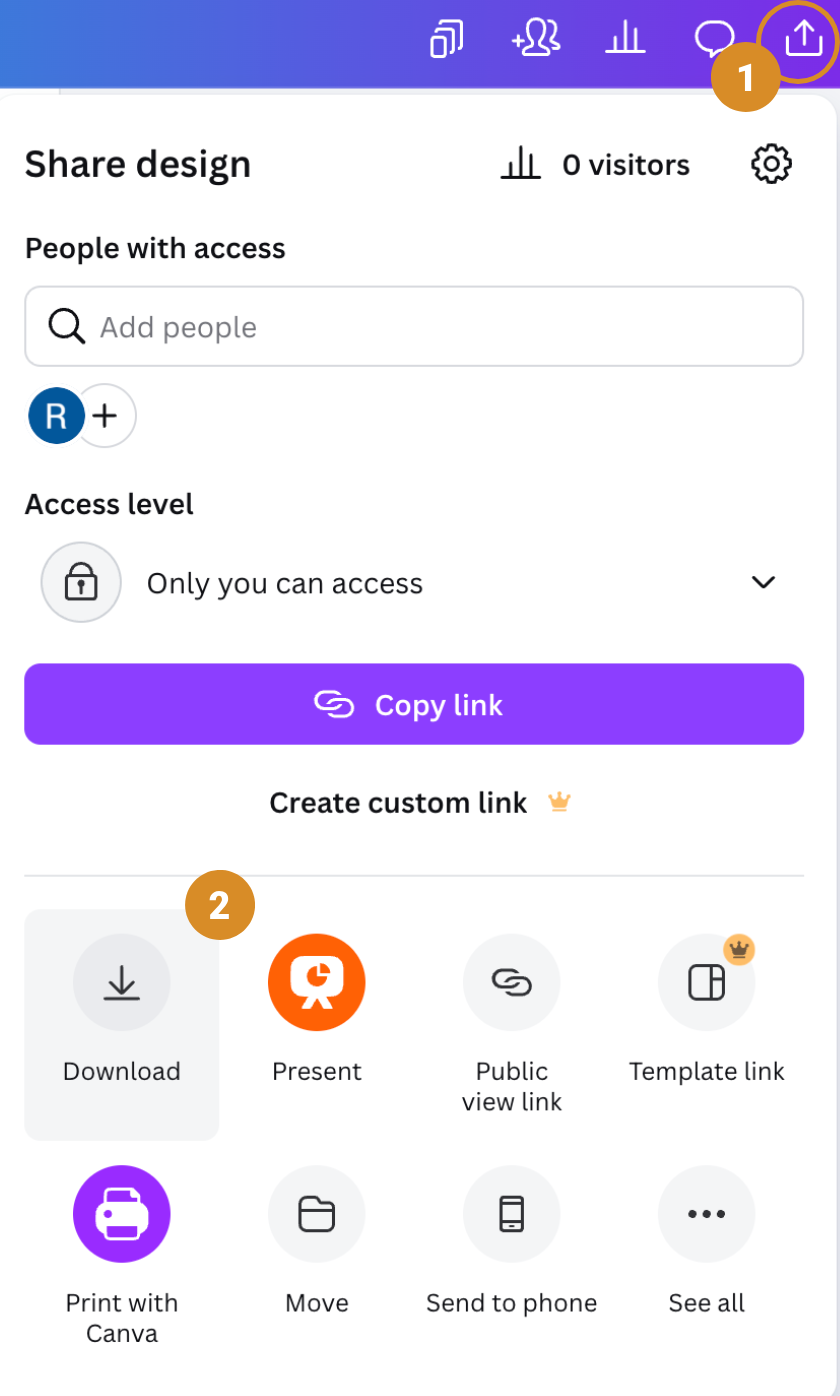
Set the File type to PNG. In most cases you won’t need a transparent background — but if you do, enable Transparent background (note: this is a Canva paid feature).

Do I need a transparent background? Only if you want a page background image to show through certain parts of your design. A solid-color or fully-illustrated design doesn’t need it — transparency is for when you already have a background image on the page, and your edge image isn’t a solid image or color. Learn more about transparency →
Canva Download panel with PNG file type and transparent background option

4

Upload your design

1
Back on the Inside Edges Create page, go to Step 2 and click Click to upload to select your newly saved PNG.
2
Optionally choose block colors for the top and bottom edges to complement your side design. You can use the eyedropper tool to select a color from your edge preview.
3
Choose a corner style: Mitered is best when there are top and bottom colors too. Choosing Square without top and bottom colors means a small section of image will be visible on the outer top and bottom corners of the book, but it provides a tidier interior view.
4
Optionally choose a border style.

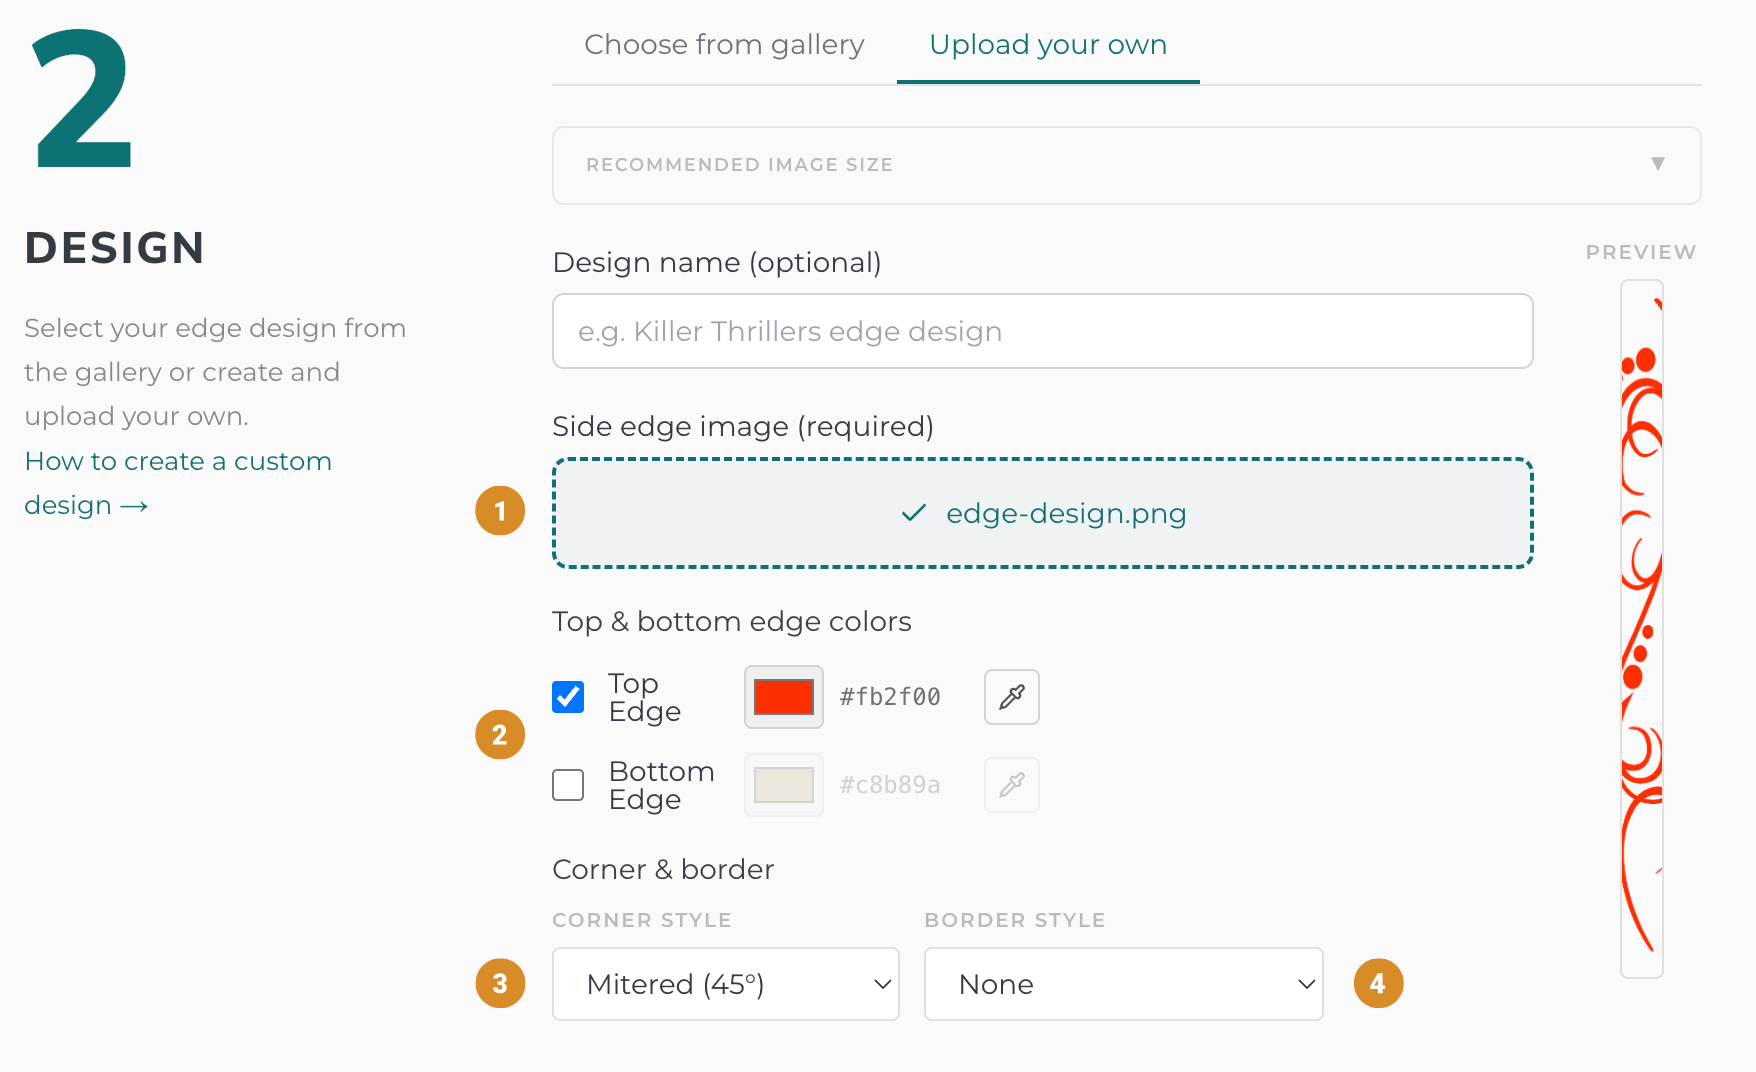
Use the interior preview in Step 3 to see how it will look before you process.

Uploading the finished edge image on the Create page
Your design is saved for 60 days. If you need to re-run your PDF — for example, after making corrections — you can reuse the same design without using another credit, as long as the page count and dimensions stay the same.
Go to Create →Questions? support@insidestory.app